Contact us today:

(847) 934-4500
tdaro@bernardandcompany.com

Contact us today:
(847) 934-4500
tdaro@bernardandcompany.com
Exact Metrology, a comprehensive metrology services provider, recently completed a job at Chicago Jet Group. Located in Sugar Grove, Illinois, the company started in 2003 with the idea of providing the highest level of professionalism and attention to detail in the corporate aviation industry. Chicago Jet Group specializes in aircraft acquisition, aircraft management, charter services, pre-purchase evaluation, aircraft avionics, aircraft consulting and aircraft maintenance. The company was retrofitting older Dassault Falcons avionics and needed a CAD model of the panel to see how it would fit.
Joe van der Sanden, application engineer from Exact Metrology, scanned the panel with an 85 series Hexagon Romer Absolute Arm. The Absolute Arm 7-axis delivers tactile probing and laser scanning in an ergonomic package. It is the best choice for ease of movement and ease of measurement. The flagship RS5 laser scanner offers high-speed 3D scanning 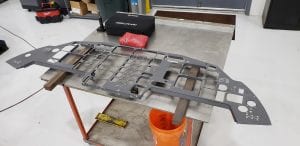
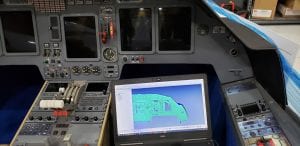
Reverse engineering was performed using Geomagic Design X. This software combines history-based CAD with 3D scan data processing and enables the creation of feature-based, editable solid models compatible with existing CAD software. Geomagic Design X allows users to re-use existing designs without having to manually update old drawings or re-measure and rebuild a model in CAD. This software is easy to learn and use, for it uses familiar history-based tools found in all major CAD products.
Chicago Jet Group was very pleased with the work performed by Exact Metrology and they would be happy to work with them again. A senior avionics technician at the company said, “This will save us months of measuring and drafting.”
Exact Metrology is ISO, AS9100 Certified as well as FFL and ITAR Registered.
Exact Metrology, with facilities in Cincinnati, Ohio, Moline, Illinois and Milwaukee, Wisconsin, plus affiliated offices throughout the country, is a comprehensive metrology services provider, offering customers 3D and CT scanning, reverse engineering, quality inspection, product development and 2D drawings. The company also provides turnkey metrology solutions, including equipment sales and lease/rental arrangements.
For information, please contact:
EXACT METROLOGY, INC.
Dean Solberg
20515 Industry Avenue
Brookfield, WI 53045
Local: 262-533-0800
www.exactmetrology.com
deans@exactmetrology.com
EXACT METROLOGY, INC.
Steve Young
11575 Goldcoast Drive
Cincinnati, OH 45249
Local: 513.831.6620
Toll Free: 866.722.2600
www.exactmetrology.com
stevey@exactmetrology.com

A new feature in the PolyWorks Inspector™ is multi-piece editing. Users can now make changes in one piece that can be propagated to other pieces. If a user has multiple pieces, they can make changes like creating, editing features, alignments, reporting items, etc. Then, these changes can be transmitted to past and future pieces/templates, create custom propagations or just apply the changes to the current piece. After choosing the propagate option, the user sees the changes in the other pieces and/or templates including report(s) or report items.
Another update of PolyWorks Inspector™ pertains to augmented GD&T. Center point features can now be reported with more capabilities. These include circularity, flatness, perpendicularity, etc. Users can also see MIN/MAX deviations and can view the color arrow deviation tags.
An online tutorial shows how to make sure the Hexagon Romer Absolute Arm is still in calibration. First, the bar artifact needs to be placed correctly to scan it. The ideal location is centered with the main axis of the arm at a distance away where it will be just below the elbow when the arm is extended out. To secure the bar, use pre-drilled tapped holes. They accept simple machinist fixturing to hold it in place. C-clamps can also be used to secure the bar to a rigid table. When doing a length checkout, only the 15 mm master probe should be used. Next, the user needs to open RDS Data Collector. Used with Hexagon Romer Absolute Arm, the software allows the operator to check the accuracy of the arm and probes and calibrate/align the probes and scanner as necessary. To start probing, move the probe to the first position. The probe needs to be properly seated in the conical feature at each end of the bar. Following the prompts in RDS, move the probe to the end conical features and pull the trigger to record a point. Once ten positions have been recorded, RDS will display the results. The MIN/MAX values should be below the standard values for the type of arm being used.
Exact Metrology is ISO, AS9100 Certified as well as FFL and ITAR Registered.
Exact Metrology, with facilities in Cincinnati, Ohio, Moline, Illinois and Milwaukee, Wisconsin, plus affiliated offices throughout the country, is a comprehensive metrology services provider, offering customers 3D and CT scanning, reverse engineering, quality inspection, product development and 2D drawings. The company also provides turnkey metrology solutions, including equipment sales and lease/rental arrangements.
For more information, please contact:
EXACT METROLOGY, INC.
Dean Solberg
20515 Industry Avenue
Brookfield, WI 53045
Local: 262-533-0800
www.exactmetrology.com
deans@exactmetrology.com
EXACT METROLOGY, INC.
Steve Young
11575 Goldcoast Drive
Cincinnati, OH 45249
Local: 513.831.6620
Toll Free: 866.722.2600
www.exactmetrology.com
stevey@exactmetrology.com
Exact Metrology, a comprehensive metrology service provider, is offering free training videos on the company’s YouTube channel. During these trying times, the company has started creating a series of training, tips and tricks, unboxing and product videos to provide additional information to their clients. The videos can be found at https://www.youtube.com/user/ExactMetrology/videos. Interested parties can bookmark the link and return often to see the latest creations.
The plan is to release three videos per week. The topics covered to date include PolyWorks Inspector™, Geomagic Design X and 3D data collection tools such as Hexagon Romer Arms, Artec scanners and GOM CT scanners. Customers can learn more about these topics on the Exact Metrology website. In addition, they can offer suggestions for upcoming videos by sending an email to training@exactmetrology.com.
Exact Metrology is an ISO 9001:2008 and AS9100 Certified Company
Exact Metrology, with facilities in Cincinnati, OH, Moline, IL and Milwaukee, WI and affiliated offices throughout the country, is a comprehensive metrology services provider, offering customers 3D and CT scanning, reverse engineering, quality inspection, product development and 2D drawings. The company also provides turnkey metrology solutions, including equipment sales and lease/rental arrangements.
Exact Metrology offers a complete line of portable scanning and measurement technologies as well as contract measurement for 3D laser scanning services, reverse engineering services, non-contact inspection, metrology services, and 3D digitizing. The company’s newest equipment includes a CT Scanner, the first in America being used for metrology rather than medical testing. Exact sells and rents metrology equipment solutions, in addition to providing testing as a service and application software training.
For more information, please contact:
EXACT METROLOGY, INC.
Dean Solberg
20515 Industry Avenue
Brookfield, WI 53045
Local: 262-533-0800
www.exactmetrology.com
deans@exactmetrology.com
EXACT METROLOGY, INC.
Steve Young
11575 Goldcoast Drive
Cincinnati, OH 45249
Local: 513.831.6620
Toll Free: 866.722.2600
www.exactmetrology.com
stevey@exactmetrology.com
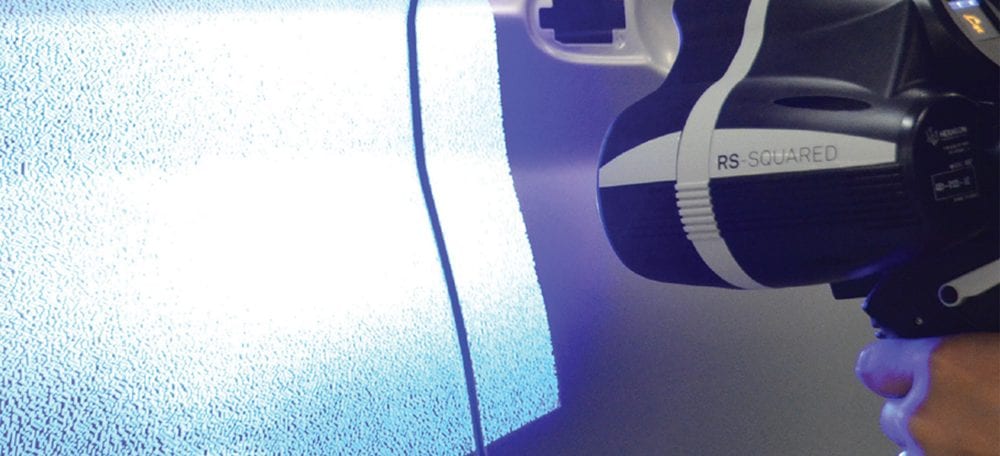
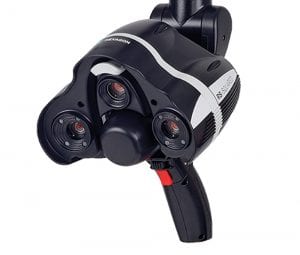
The Absolute Arm 7-axis system delivers tactile probing and laser scanning in a uniquely ergonomic package. It is the best choice for high-end portable measurement applications. The articulating arm offers unparalleled ease of movement and ease of measurement.
RS-SQUARED is a white light scanner that uses the Absolute Arm system to position large square ‘tiles’ of 3D scan data. This removes the need for time-consuming application of reference markers or spray, or complex mechanical processes such as fringe projection that requires a stable environment. Up to 4 data tiles are captured every second, which combined with minimal set-up time, creates a scanning system capable of generating point cloud data in very little time. As with other Absolute Arm scanners, the RS-SQUARED can be easily removed and remounted without needing time-consuming recalibration processes due to an innovative repeatable mounting system.
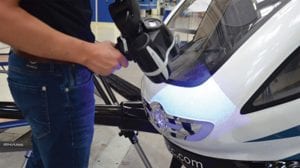
The RS-SQUARED area scanner represents a new direction for portable measuring arm technology, embracing the need for high-productivity by incorporating advanced white light scanning technology. Together with the Absolute Arm 7-axis, it offers the ultimate all-around portable measurement solution for medium-to-large sized components.
Exact Metrology is an ISO AS9100 Certified along with being FFL and ITAR Registered.
Exact Metrology, with facilities in Cincinnati, Moline and Milwaukee plus affiliated offices throughout the country, is a comprehensive metrology services provider, offering customers 3D and CT scanning, reverse engineering, quality inspection, product development and 2D drawings. The company also provides turnkey metrology solutions, including equipment sales and lease/rental arrangements.
For information, please contact:
EXACT METROLOGY, INC.
Dean Solberg
20515 Industry Avenue
Brookfield, WI 53045
Local: 262-533-0800
www.exactmetrology.com
deans@exactmetrology.com
EXACT METROLOGY, INC.
Steve Young
11575 Goldcoast Drive
Cincinnati, OH 45249
Local: 513.831.6620
Toll Free: 866.722.2600
www.exactmetrology.com
stevey@exactmetrology.com


Jason Kleinhenz received a biomedical engineering degree from the University of Cincinnati. He is currently the training and marketing manager at Exact Metrology.
Exact Metrology, a comprehensive metrology service provider, shares helpful safety tips for metrology workers during the COVID-19 pandemic. These tips are courtesy of Jason Kleinhenz, Exact Metrology marketing and training manager.
With much of the workforce operating from home, keeping up with quality inspection and reverse engineering is difficult during this time. However, there are solutions to counteract this problem. Some companies employ several of these tactics daily, but in these trying times they are much more relevant to maintain effective production.
If you are in the workplace, follow all the stated guidelines. These include staying 6 feet away, washing/sanitizing touched surfaces and washing your hands. Also remember to clean the objects you’re working with such as data collection tools and computers.
Only one person should collect the data from the object(s). That person is responsible for handling the objects and the data collection tools. Of course, the designated person also needs to clean and sanitize all objects, tools and surfaces.
Workers must save and upload data sets (and/or workspaces) to the cloud. Due to security threats, a company’s IT team should use a virtual private network (VPN) and/or file transfer protocol (FTP). This reduces the chances of data being hacked or stolen.
Have another person, or a team, work separately to download (receive) the data sets, or workspaces and process them. They will have their own safety procedures in place (essentially the same as the data collector). If possible, the processing person(s) should write programs at the same time the data is collected. This saves time and money as two operations are occurring at the same time. Most likely, this is not possible in reverse engineering projects. However, in quality inspection projects, this is a massive time-saving practice.
Communicating between the collector and processor(s) can be done quickly, and virtually, with online services like Skype and Zoom. The good old-fashioned phone works well for quick conversations too. There are some software packages that allow seamless workspace sharing between different people and teams such as a package through PolyWorks® by InnovMetric.
These techniques and tools can help companies reach their quality and reverse engineering objectives during social distancing. Exact Metrology is available to answer any questions about how to maximize efficiency or help with projects.
Exact Metrology is an ISO AS9100 Certified along with being FFL and ITAR Registered.
Exact Metrology, with facilities in Cincinnati, Moline and Milwaukee plus affiliated offices throughout the country, is a comprehensive metrology services provider, offering customers 3D and CT scanning, reverse engineering, quality inspection, product development and 2D drawings. The company also provides turnkey metrology solutions, including equipment sales and lease/rental arrangements.
For information, please contact:
EXACT METROLOGY, INC.
11575 Goldcoast Drive
Cincinnati, OH 45249
Local: 513.831.6620
Toll Free: 866.722.2600
www.exactmetrology.com
info@exactmetrology.com
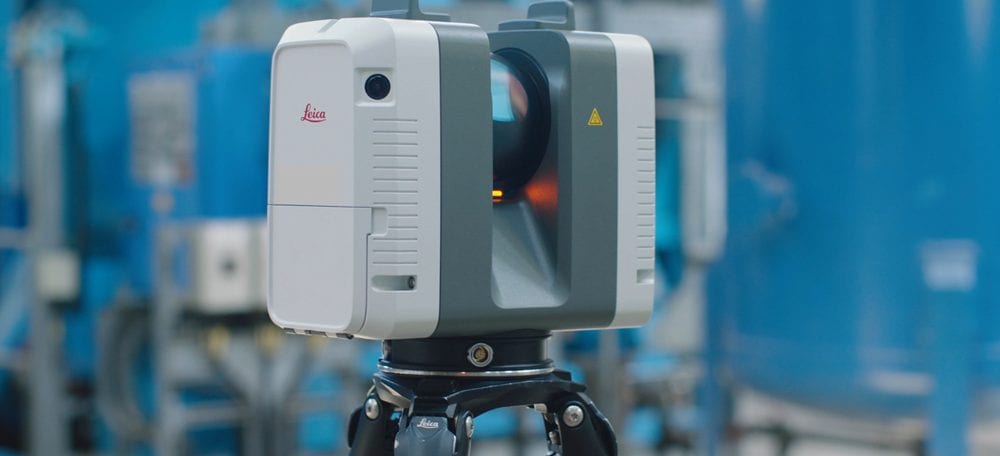
Scanner features Leica Cyclone Field 360 and Leica Cyclone REGISTER 360
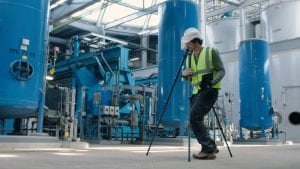
3D reality capture is a process of scanning and capturing any site, for example, factories, buildings, crashes and crime scenes, in a 3D digital model, combining measurements and imagery. The model can be used for design and comparison purposes in various situations, capturing every detail with to-the-millimeter accuracy. This technology combines one-touch operation with portability and speed to deliver high levels of accuracy, automation and the ability to create 3D environments in a matter of minutes.
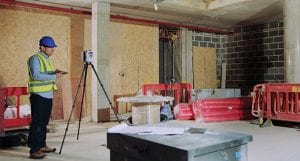
Thanks to 3D reality capture, Building Information Modeling (BIM) experts save time and money as BIM processes become more efficient, from the accuracy of construction documentation to design and build quality assurance. The latest laser scanning technological developments improve understanding and documentation of the build environment through the use of millimeter-accurate laser scanning and High-Dynamic Range (HDR) imagery. By using 3D reality capture, previews of data and imagery are viewable onsite directly from a tablet, enabling scans to be checked and verified before going to the office.

With a measuring rate up to 2 million points per second, automated targetless field registration (based on VIS technology) and automated transfer of data from site to office, the device and software greatly reduce time spent in the field and maximize productivity.
The scanner’s portable design and collapsible tripod fit into most backpacks. Low noise data allows for better images, resulting in crisp, high-quality scans that can be used in a variety of applications.
As part of the RTC360 solution, the Cyclone FIELD 360 links the 3D data acquisition in the field with the laser scanner and data registration in the office with Cyclone REGISTER 360. The user can automatically capture, register and examine scan and image data.
Exact Metrology is ISO, AS9100 Certified as well as FFL and ITAR Registered.
Exact Metrology, with facilities in Cincinnati, Moline and Milwaukee plus affiliated offices throughout the country, is a comprehensive metrology services provider, offering customers 3D and CT scanning, reverse engineering, quality inspection, product development and 2D drawings. The company also provides turnkey metrology solutions, including equipment sales and lease/rental arrangements.
For information, please contact:
EXACT METROLOGY, INC.
Dean Solberg
20515 Industry Avenue
Brookfield, WI 53045
Local: 262-533-0800
www.exactmetrology.com
deans@exactmetrology.com
EXACT METROLOGY, INC.
Steve Young
11575 Goldcoast Drive
Cincinnati, OH 45249
Local: 513.831.6620
Toll Free: 866.722.2600
www.exactmetrology.com
stevey@exactmetrology.com
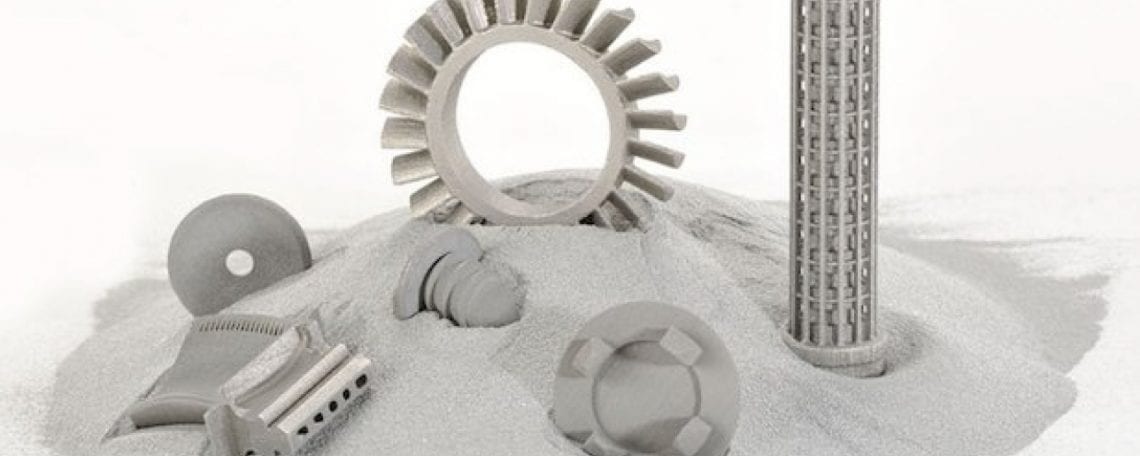
Exact Metrology, a comprehensive metrology service provider, participated in a webinar on February 20, 2020. The general subject involved testing and inspecting parts that are 3D printed. Josh Schradin, a project manager at Exact Metrology, gave a presentation on industrial CT (Computed Tomography) for additive manufacturing.
A CT scan, also known as an X-ray Computed Tomography (X-ray CT) or a Computerized Axial Tomography scan (CAT scan) uses computer-processed combinations of several X-ray images taken from different angles to produce cross-sectional (tomographic) images or “virtual slices” of specific areas of a scanned object. This allows the user to see inside the object without cutting or damaging it. The basic components of a CT system are its X-ray source, the sample on a rotary table and a detector (see image 1).

Magnification is also an important part of CT scanning. Moving the object closer to the X-ray source provides a larger shadow, optimizing the resolution of the final image, while having an object closer to the detector provides a smaller shadow that decreases the final resolution.
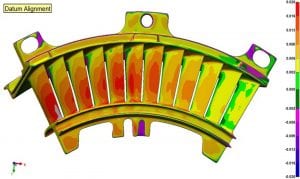
Trapped powder can be located during the printing process either by magnification or using a color map that shows deviation to the nominal model (see image 8).
Product content positon allows manufacturers to audit their products and determine if embedded objects are placed properly.
Exact Metrology is an ISO AS9100 Certified along with being FFL and ITAR Registered.
Exact Metrology, with facilities in Cincinnati, Ohio, Milwaukee, Wisconsin and Moline, Illinois and affiliated offices throughout the Midwest, is a comprehensive metrology services provider, offering customers 3D and CT scanning, reverse engineering, quality inspection, product development and 2D drawings. The company also provides turnkey metrology solutions, including equipment sales and lease/rental arrangements.
For more information, please contact:
For information, please contact:
EXACT METROLOGY, INC.
Dean Solberg
20515 Industry Avenue
Brookfield, WI 53045
Local: 262-533-0800
www.exactmetrology.com
deans@exactmetrology.com
Steve Young
Exact Metrology, Inc.
11575 Goldcoast Drive
Cincinnati, OH 45249
Toll Free: 866-722-2600
Local: 513-831-6620
www.exactmetrology.com
stevey@exactmetrology.com

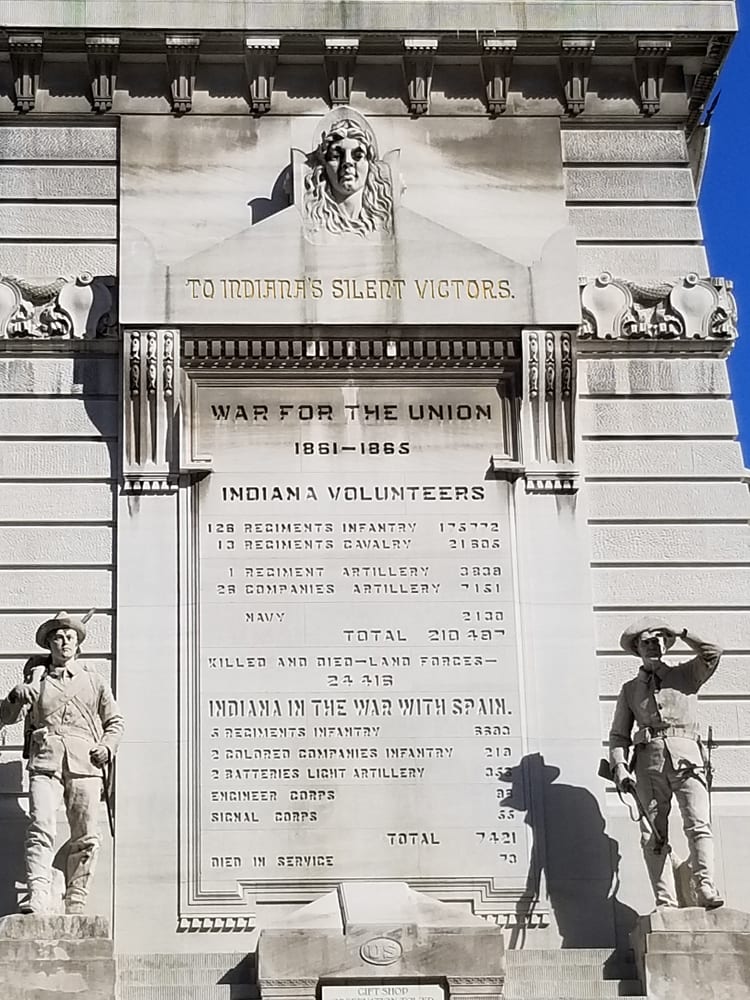
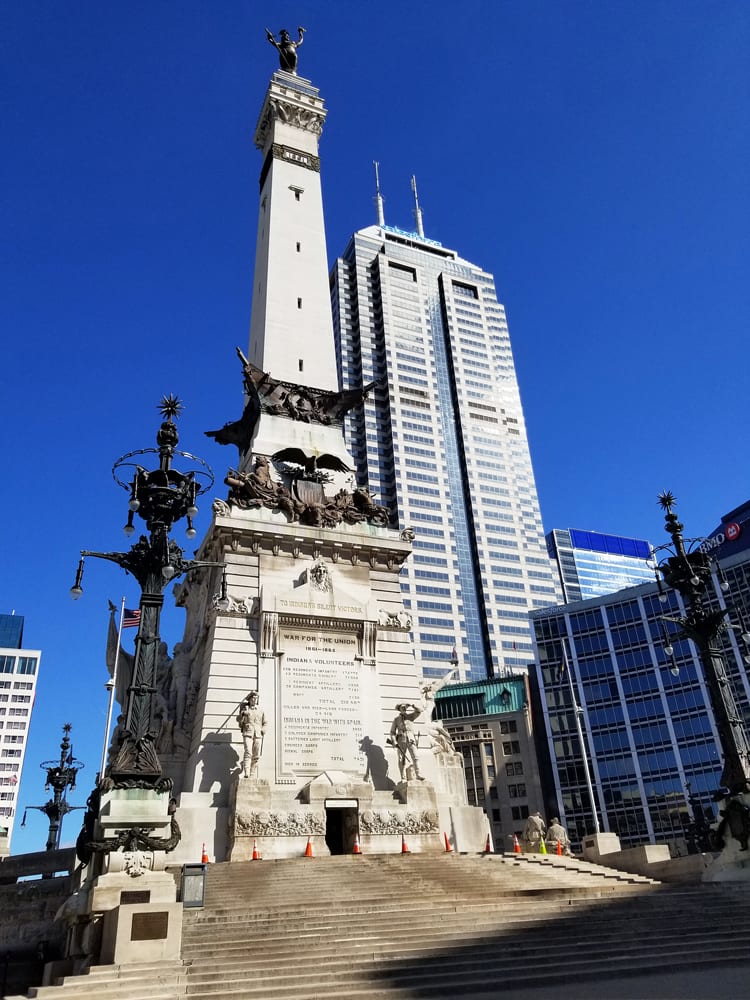
Innovative, an ad agency in Indianapolis, was contacted by Downtown Indy Inc. to create a light projection at Monument Circle for Veterans Day. Located in the heart of downtown Indianapolis, it features the Soldiers & Sailors Monument and the Colonel Eli Lilly Civil War Museum. Downtown Indy Inc., the city’s nonprofit organization, received a grant from the Lilly Endowment for the show and the goal of the ad agency was to produce a projection show that will be image mapped on two buildings in the circle’s southwest quadrant. To accomplish this, Innovative became the creative content provider for Exact Metrology.
Greg Hoeting, the application specialist at Exact Metrology, used a Leica P40 to collect point cloud data. Leica ScanStation P-Series 3D laser scanners are ideal for capturing 3D geometry of civil infrastructure, creating an as-built representation of large industry complexes, reconstructing crime scenes or generating 3D data for integration into Building Information Modeling (BIM). In addition, these laser scanners offer unsurpassed range and angular accuracy with low-range noise and survey-grade dual-axis compensation that form 3D color point clouds mapped realistically.
Next, Hoeting used Polyworks® to mesh the data and export a .stl file. The Polyworks® software suite maximizes productivity, quality and profit when integrating 3D measurement devices into the industrial manufacturing process. The software interfaces directly with major brands and technologies of single- point and point cloud 3D models through plug-in extension models. Furthermore, Polyworks® supports a wide array of native point cloud and polygonal model file formats.
Lastly, Hoeting used Leica Cyclone to align the color texture with a center point at the base of the monument. This point cloud processing software provides the widest range of options for 3D laser scanning projects in engineering, surveying, construction and related applications.
Exact Metrology scanned around the monument and several buildings such as: Novel Coworking Circle Tower, IPL, Guaranty Building, Salesforce Tower (Chase Tower portion).
Exact Metrology is an ISO AS9100 Certified along with being FFL and ITAR Registered.
Exact Metrology, with facilities in Cincinnati, Ohio, Milwaukee, Wisconsin and Moline, Illinois and affiliated offices throughout the Midwest, is a comprehensive metrology services provider, offering customers 3D and CT scanning, reverse engineering, quality inspection, product development and 2D drawings. The company also provides turnkey metrology solutions, including equipment sales and lease/rental arrangements.
For more information, please contact:
Steve Young
Exact Metrology, Inc.
11575 Goldcoast Drive
Cincinnati, OH 45249
Toll Free: 866-722-2600
Local: 513-831-6620
www.exactmetrology.com
stevey@exactmetrology.com
This location will serve as a training, support, contract measurement and sales center. Training will be provided on software packages such as: PolyWorks®, Geomagic and PC-DMIS. The Polyworks® software suite maximizes productivity, quality, and profit, while integrating 3D measurement technologies into an industrial manufacturing process. Geomagic is a leading provider of 3D software that creates digital models of physical objects for industries like aerospace, archeology, medical, dental, tooling and foundry. Provided by Exact Metrology through Hexagon 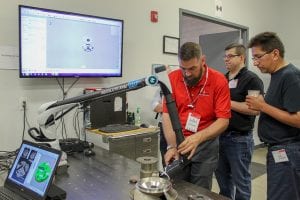
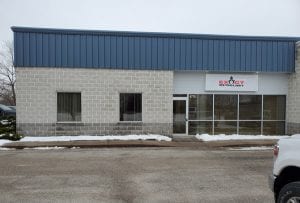
Commenting on the importance of this opening, Joe Wright of Exact Metrology said, “Exact Metrology can add support and service to our customers in western Illinois and Iowa. We hope to keep growing the customer base in this area.”
Exact Metrology is an ISO AS9100 Certified along with being FFL and ITAR Registered.
Exact Metrology, with facilities in Cincinnati and Milwaukee and affiliated offices throughout the Midwest, is a comprehensive metrology services provider, offering customers 3D and CT scanning, reverse engineering, quality inspection, product development and 2D drawings. The company also provides turnkey metrology solutions, including equipment sales and lease/rental arrangements.
For information, please contact:
EXACT METROLOGY, INC.
Dean Solberg
20515 Industry Avenue
Brookfield, WI 53045
Local: 262-533-0800
www.exactmetrology.com
deans@exactmetrology.com
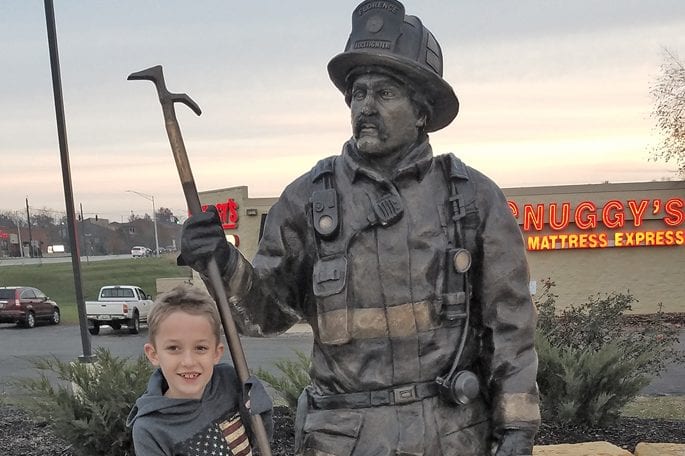

Although Tsuchiya has used 3D software, digital scanning, 3D printing and CNC (Computer Numerical Control) to help create sculptures in the past, the Florence project was the first time digital scans of actual people were used to create a sculpture.
Tsuchiya planned the general pose of the firefighter, the public service worker and the police officer with a little girl, using a 3D design program. He asked Matthew Martin, the Division Manager of Exact Metrology, and Scott Menne to digitally scan actual employees from the City of Florence, Kentucky. The firefighter in gear was scanned at the fire station, while the police officer and Martin’s daughter were scanned at the Florence city headquarters. A friend of the City of Florence posed as the public service worker.
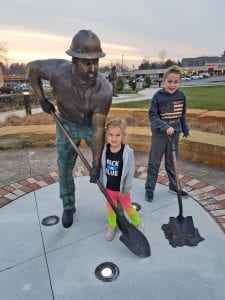
After Tsuchiya finished the sculpting, the clay/foam/wood statues were delivered to the Sincerus Bronze foundry in Indianapolis to cast them in bronze. The whole process, from concept to bronze finishing, took four to five months for each sculpture.
For more information, please contact:
Steve Young
Exact Metrology, Inc.
11575 Goldcoast Drive
Cincinnati, OH 45249
Phone: 614-264-8587
Local: 513-831-6620
www.exactmetrology.com
stevey@exactmetrology.com
Exact Metrology is an ISO 9001:2008, AS9100, FFL and ITAR Certified Company.
Exact Metrology, with facilities in Cincinnati and Milwaukee and affiliated offices throughout the Midwest, is a comprehensive metrology services provider, offering customers 3D and CT scanning, reverse engineering, quality inspection, product development and 2D drawings. The company also provides turnkey metrology solutions, including equipment sales and lease/rental arrangements.
Continue reading